How to Wipe HDD/SSD from BIOS?
You may need to reinstall Windows in some situations. Here will how to wipe a hard drive from BIOS for reinstallation or other purposes.
Why need to wipe a hard drive from BIOS?
“Can’t use Windows 7. I need to completely erase my 2 HDDs, not just format them. Need to do it in BIOS, but can’t find any menu that leads to that kind of stuff. Also, need to clear BIOS with move that small pin on the motherboard. Want to do this to make my HDDs new like it was when I bought them.”
From this Scenario, we learn that the user wants to wipe a hard drive from BIOS for new Windows installation. In fact, many users want to wipe a hard drive for different using. If you want to give away the hard drive and don’t want to expose the data on it, wiping a hard drive should be the best way to remove data completely from the hard drive. While if there is any problem with your hard drive installed operating system, and you want to use it again, an easy way to wipe hard drive from BIOS is simple for a fresh Windows installation.
It is different between wiping HDD and wiping SSD
To wipe a hard drive means to remove all data on the hard drive including operating system, programs, and files. If you are wiping a data hard drive (without OS installed), you can wipe all data by formatting hard drive partitions. But if you are trying to wipe a system drive, you need to wipe it from the BIOS, because you cannot format the hard drive on which Windows 11/10/8/7 is running.
You may use a solid-state drive (SSD) as the boot drive. When your Windows OS cannot be used normally, you may need to reinstall Windows too. However, SSD is different from HDD, if you use the same way of wiping HDD to wipe SSD, it may decrease its lifespan. The good fortune is, this article will show you how to wipe a hard drive from BIOS and how to secure erase SSD from BIOS separately.
How to wipe a hard drive from BIOS?
If you need to format a disk and you can’t do it within Windows 11/10, you can make use of third-party software to create a bootable CD, DVD, or USB flash drive, boot from it and then, wipe the hard drive. Here we introduce you AOMEI Partition Assistant Standard, which should be the best hard disk wipe tool that allows you to wipe hard drive from BIOS easily and freely.
- Before you do, you need to prepare for it:
- Free download AOMEI Partition Assistant, install and launch it.
- Prepare a USB drive and use AOMEI Partition Assistant to create a bootable USB.
- Back up hard drive first because wiping hard dive will erase all data on it.
After that preparation, you can start to wipe the hard drive.
▶ Wipe an HDD from BIOS
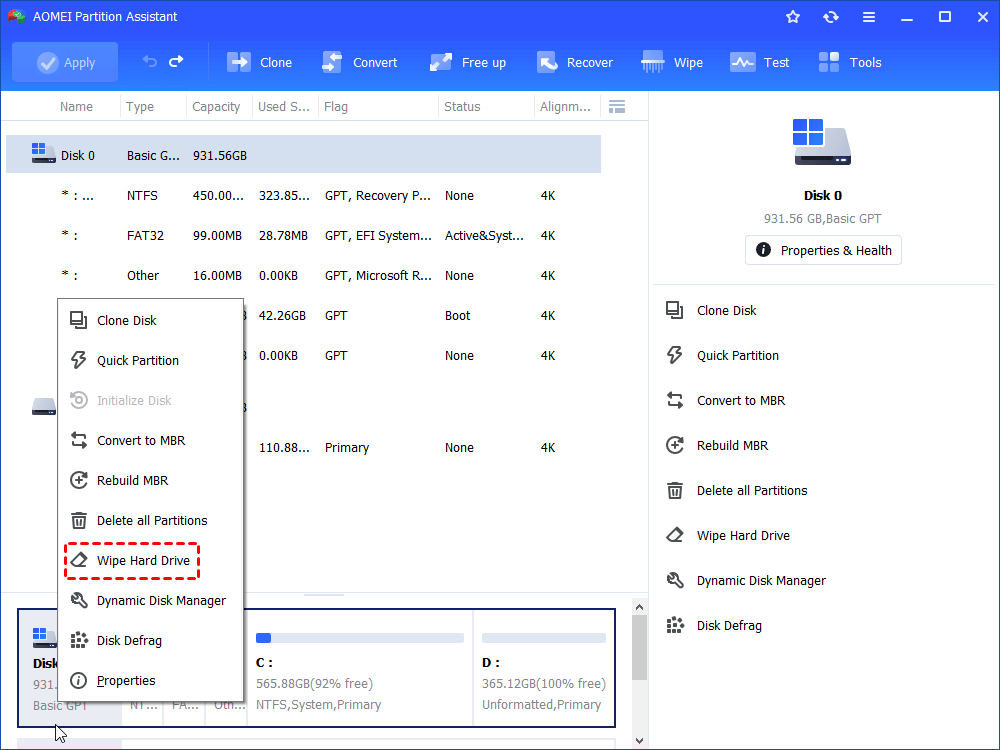
Step 1. Boot your computer with the bootable USB you created. You will get into the main interface of AOMEI Partition Assistant. Click the hard drive you want to wipe and select Wipe Hard Drive.
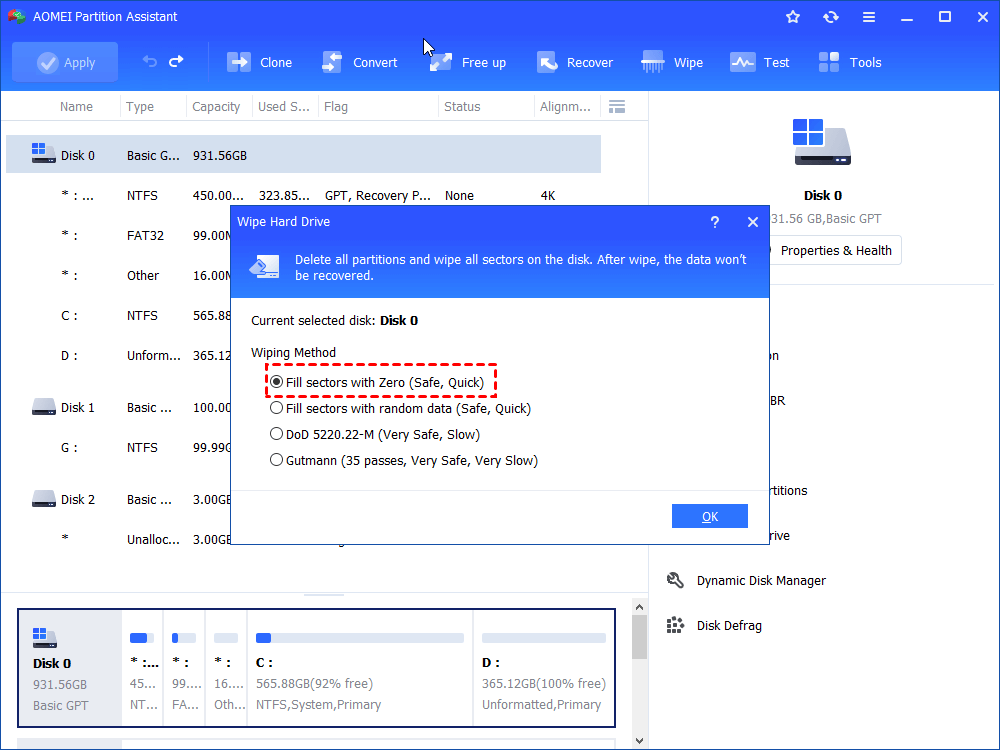
Step 2. It will pop up a window where listing the wiping methods. The first option is enough for normal wiping. To use more advanced options, please upgrade to Professional edition.
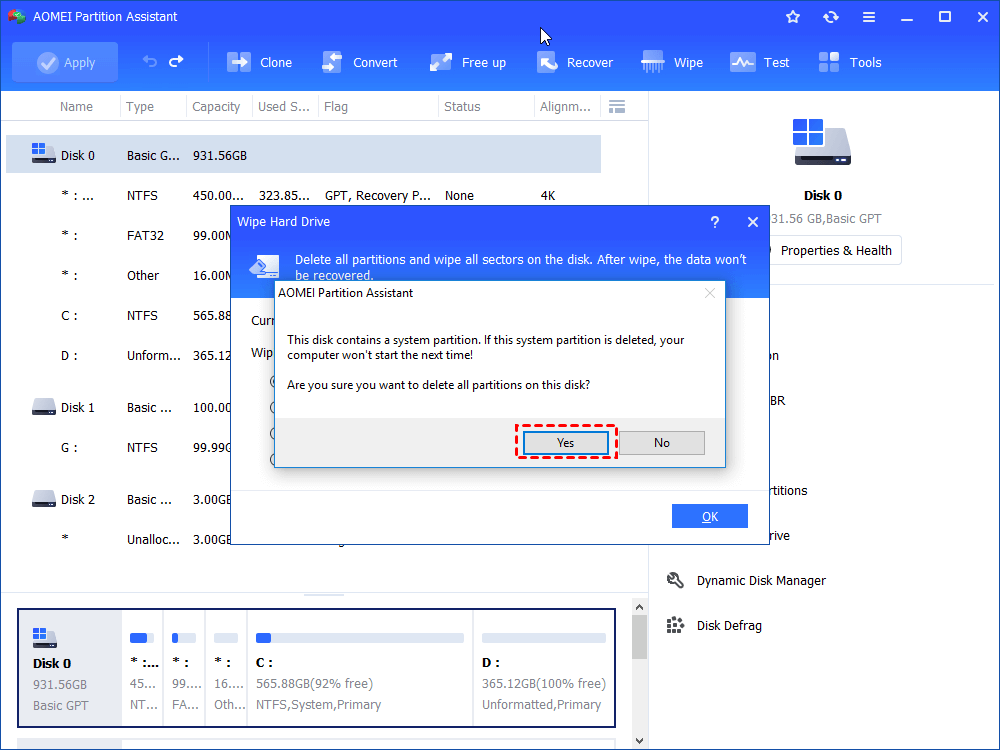
Important: Deleting system drive will cause computer unbootable. Make sure you are aware of this.
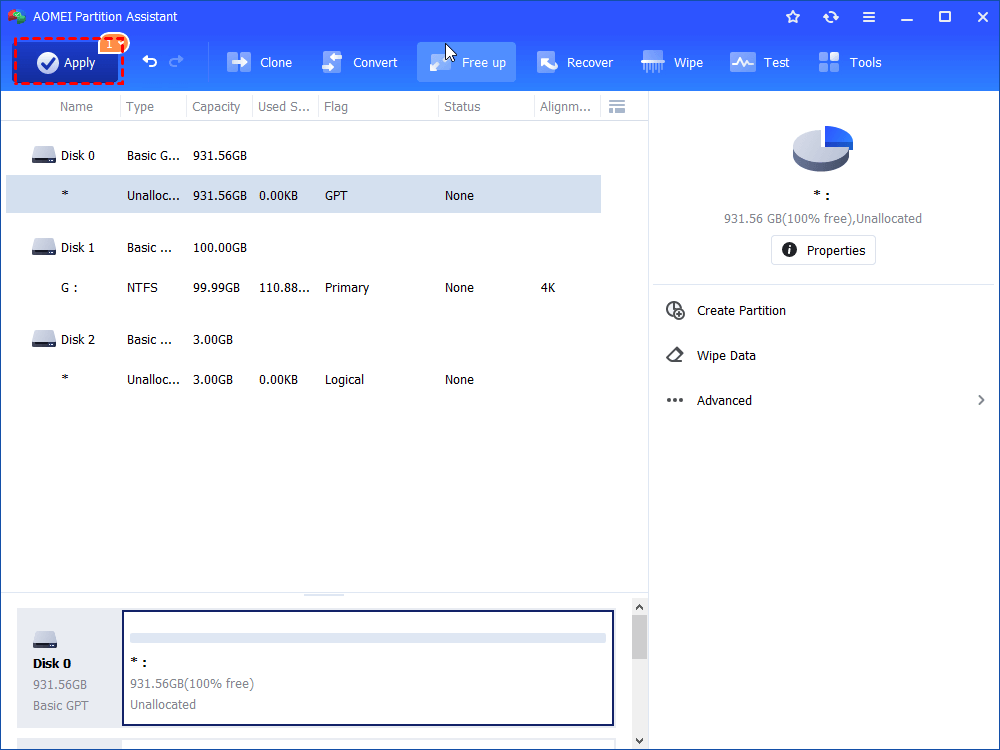
Step 3. Then you will back to the main interface, click Apply to submit the operations.
Thus, you have already wiped a hard drive. However, you can’t use the same way to wipe a solid-state drive (SSD) because it would hurt the SSD. The next content is about how to secure erase SSD with AOMEI Partition Assistant.
▶ Securely erase SSD
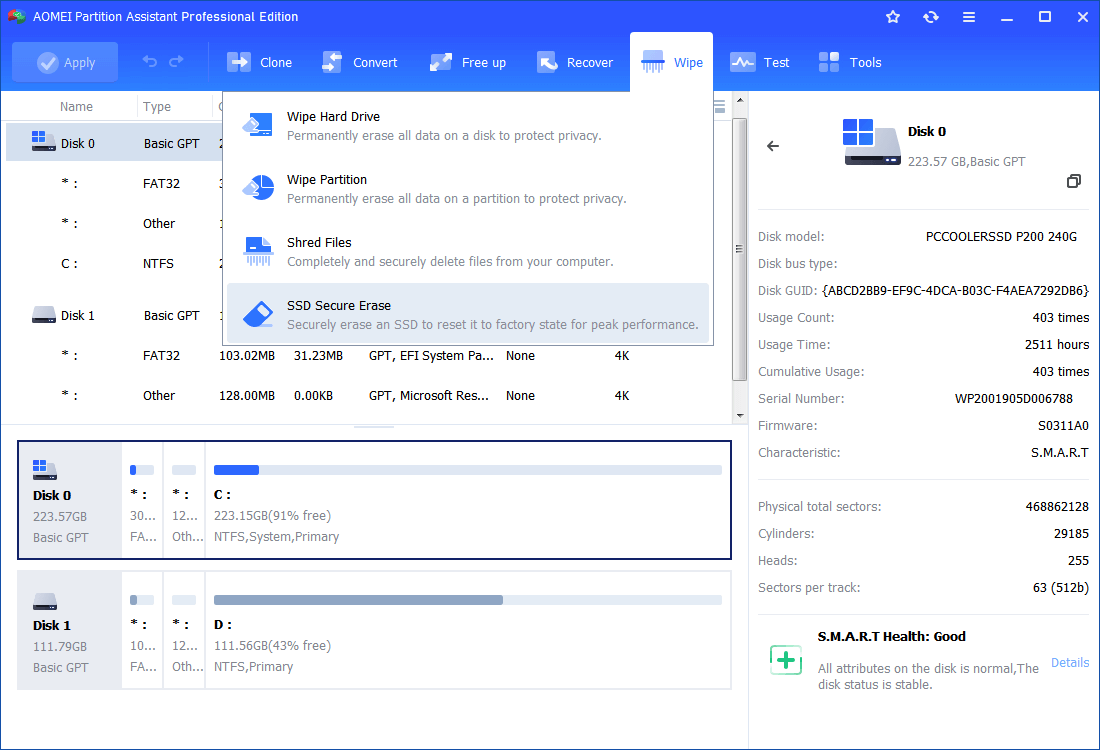
If you want to securely erase SSD, you need to upgrade AOMEI Partition Assistant to Pro version, which can help erase all data on the SSD and restore it to the factory settings, and restore SSD performance. But it cannot work secure erase SSD from BIOS at present. If you need to securely erase an SSD, you can plug it into a Windows 7 computer and start to erase SSD permanently without hurting it.
Step 1. Connect the SSD to your Windows 7 device. Launch AOMEI Partition Assistant Pro. Click Secure Erase SSD Wizard at the left pane. If you have any important data on the SSD, back up SSD first since this operation will delete and erase all data on the SSD, and then, click Next.
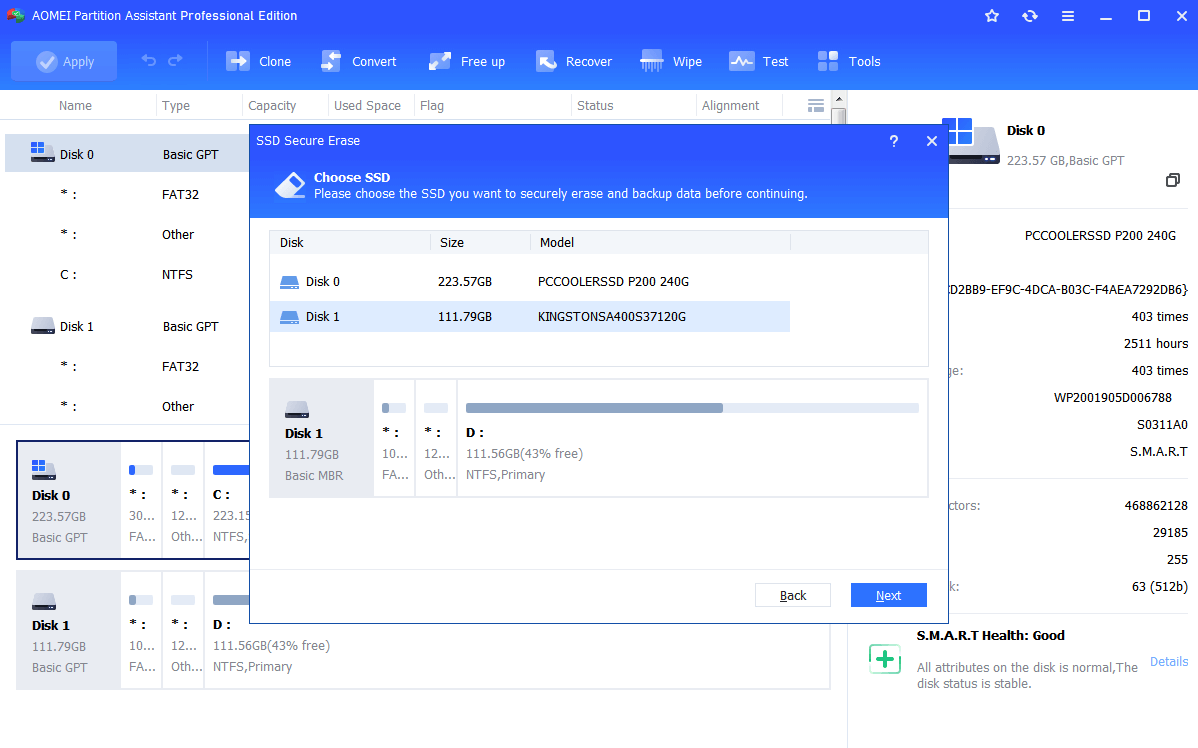
Step 2. Then, you can select the SSD that need to be erased.
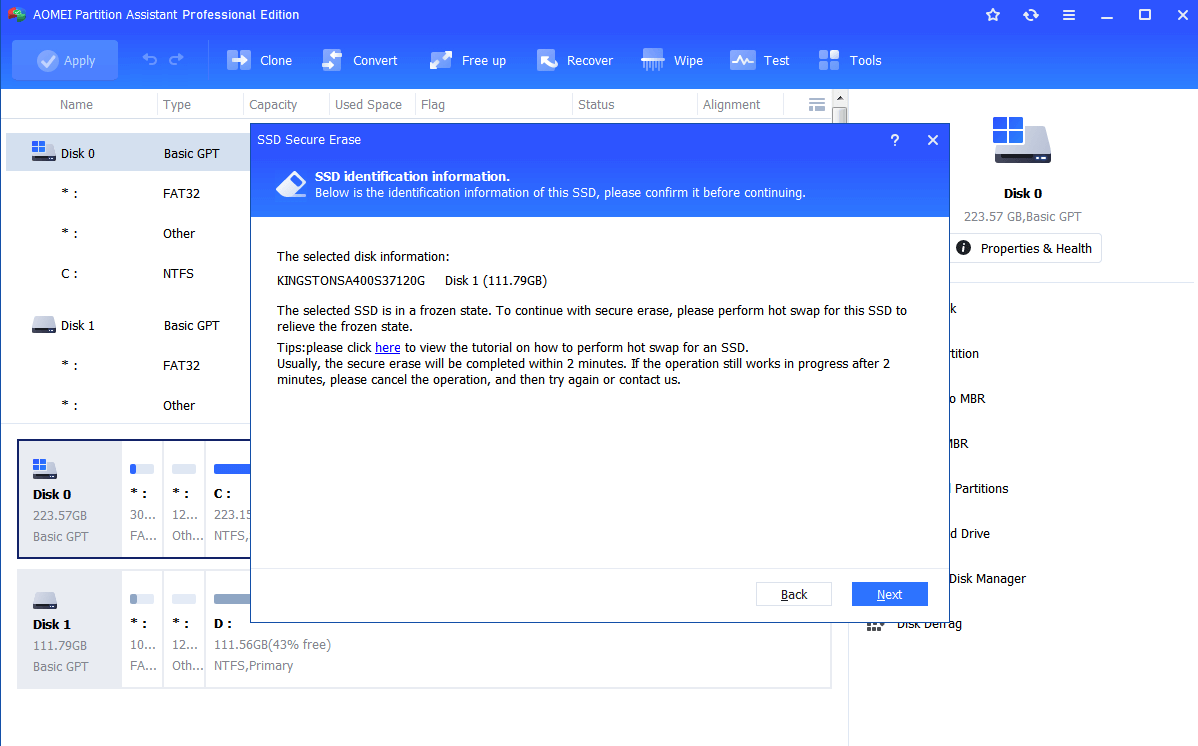
Step 3. It will remind you that your SSD in a frozen state. Then, you need to do a hot swap for relieving it.
How to perform Hot-swap:
-
1) Open your computer case. If it is a laptop, open the computer's rear cover or drive shell.
-
2) Located the SSD that needs to be securely erased.
-
3) Unplug the power cable from the SSD.
-
4) Disconnect the SATA data cable from the SSD.
-
5) Reconnect the SATA cable to the SATA port on the SSD.
-
6) Finally, plug the power cable back into the SSD’s power connector.
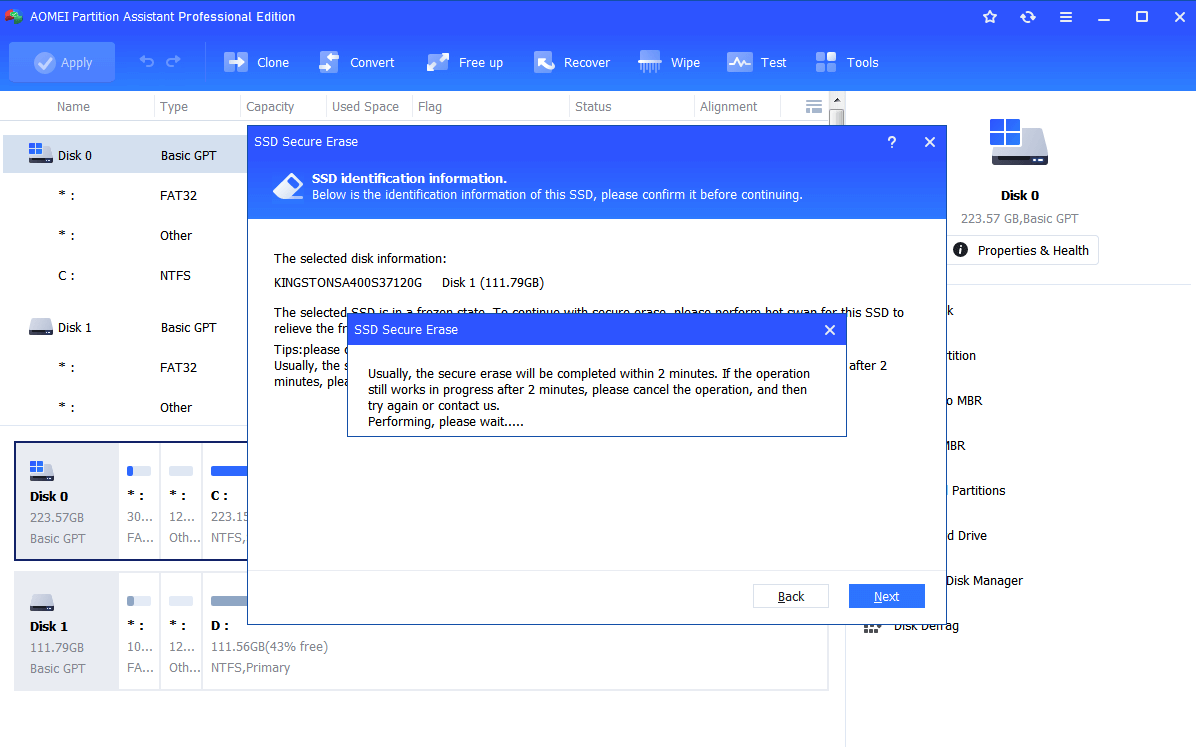
Step 4. After that, you can continue to secure erase SSD by clicking Next. Wait till the SSD has been erased successfully.
Summary
Those are the steps for how to wipe a hard drive from BIOS. No matter wipe HDD or secure erase SSD, AOMEI Partition Assistant would do the best job. Actually, AOMEI Partition Assistant is more than a wipe hard drive tool. Besides wiping hard drive, it can also help you recover lost data, initialize disk, format partition, delete partition, and do many other things to manage your HDD/SSD in the best status.

